VFE Resources

Visit the introduction page first where you can view a video showing a completed Powers of Ten Google Earth file.
This page includes seven video tutorials with supporting text to guide you through the process of making your own Powers of Ten in Google Earth.
1.01 Using PowerPoint to Enhance Pictures
This video shows how you can use PowerPoint to add elements to pictures (like boxes) and then save the individual slides as separate image files. Several other software packages can be used for editing images. PowerPoint was chosen because of its familiarity. Use whatever software you prefer
1.02 Uploading Images Created in PowerPoint to Picasa Web Albums
This video shows how to upload the images created in the first video to Picasa web albums so they can be easily used in Google Earth. As with video 1.01 above, there are other technological options exist and you should choose the option appropriate for your setting. Note that some schools or districts block photo sharing websites. If this is the case in your district, you may wish to upload the images to a district site.
1.03 Embedding Images in Google Earth Placemarks
This video shows how to embed images that are part of Picasa web albums into Google Earth placemarks. For many online photos, simply right-clicking on images will allow you to copy the image’s URL (in Chrome, Firefox or Safari, but not in Internet Explorer) and you can simply click the “Add image...” button in Google Earth and paste in the URL to embed your photo. We do not recommend using Internet Explorer.
1.04 Drawing Range Rings
This video shows how to draw range rings, circles of a specified radius, around a point. The range rings will be used in the next video as guides for drawing squares, each one hundred times larger than the last.
1.05 Drawing Boxes and Making Folders in Google Earth
This video shows how to draw squares on the virtual Earth, each one hundred times larger than the last. The next step includes text that can be cut and pasted for labelling the boxes.
Google Earth Pro, now available for free, allows measurement of the areas and perimeters of polygons. This allows you to check the accuracy of your drawings. This feature only recently became broadly available and is not shown in the video.
1.06 Labeling Placemarks and Getting Ready to Play
This video shows adding text and getting the tour ready to play. Below the video you will find text that can be cut and pasted into the placemarks.
You can cut and paste the text below for labeling boxes. You may wish to add more descriptive text, as is done for the first box. The labels begin with the 100 meter by 100 meter box. The 10,000 km by 10,000 km box can’t be drawn in a practical way as explained below. You may wish to add that text in a placemark placed on Earth’s limb (apparent edge).
100 meters x 100 meters
100 m x 100 m = 10,000 m2
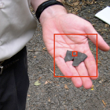
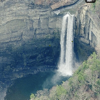
One hundred meters is the distance a person can run in ten seconds.
1 km x 1 km
1000 meters by 1000 meters = 1 square kilometer.
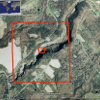
10 km x 10 km
10 km x 10 km = 10,000 m x 10,000 m = 100,000,000 square meters.
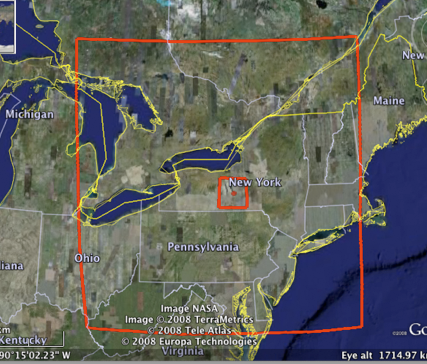
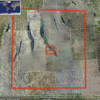
100 km x 100 km
100 km x 100 km = 100,000 m x 100,000 m = 10,000,000,000 square meters
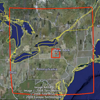
1000 km x 1000 km
1,000,000,000,000 square meters = one trillion square meters. That's a lot of square meters!
Where a kilometer comes from...
A kilometer was originally defined as one ten thousandth of the distance between the Equator and the Pole.
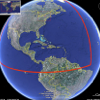
So, the box 10,000 km on a side ends up not looking very square at all when drawn on a flat map of our round world. Attempting to use the range rings as a guide doesn’t work here.
A square that's 10,000 kilometers on a side would have a perimeter of 40,000 kilometers. Since 40,000 kilometers is Earth's circumference, you can't draw a square that big on Earth.
If I was drawing this on the globe, what would it look like?
Instead of trying, I’ve placed a marker at the limb of the Earth. The limb is the visible edge.
1.07 Tweaking the Settings and Playing the Tour
This final video shows the finished product - Powers of Ten in Google Earth.
Resources for Making your Own Powers of Ten
On this page:
-
•Make Your Own Powers of Ten tutorials
-
•Link to video tutorials. May 2015: Download a Google Earth file with embedded tutorials here.
Downloads:
Elsewhere on the Site
Selected Images

Your Own Powers of Ten Tutorials
HAS SOMETHING GOT YOU STUCK?
-
•We’re developing an FAQ. In order to do that, we need you to ask questions!
-
•Send an email to Don or Skype him at dugganhaas.
Here’s our first (there are now a few more questions and answers at the bottom of the introduction page):
-
Q: The option I want to choose in Google Earth is grayed out. For example, I can’t add a folder. What do I do?
-
A: A window or floating toolbar is a likely culprit. If you’ve recently played a tour, the control bar window may be open in the lower left, and it might be hidden until you move your cursor into the Google Earth window. Close the controller by clicking on the X. This problem also happens when windows are minimized instead of closed.